What is a Shoppable Video?
Shoppable videos refer to content that is not streamed live, but rather uploaded to your website or sync'd from your social channels (you can upload directly from YouTube and Instagram) . Just as with live events, you can add products, discount codes, and track analytics. If instead you want to create a live event, refer to the schedule a live event article.
How to Create a Shoppable Video
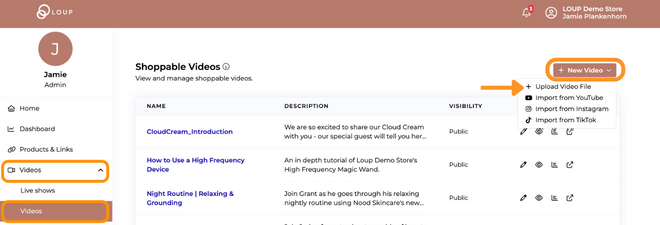
1. In the left sidebar, navigate to Go to Videos > Videos and click the ‘New Video’ button then ‘Upload Video File’ option:
Importing from Instagram or TikTok
If you would like to sync your Instagram or TikTok account to Loup and import videos that way, click the “New Video” button and select 'Import from Instagram" or “Import from TikTok” from the dropdown.
3. Click Select File, and upload an mp4 video (max 3GB). If you are uploading from YouTube, follow these steps
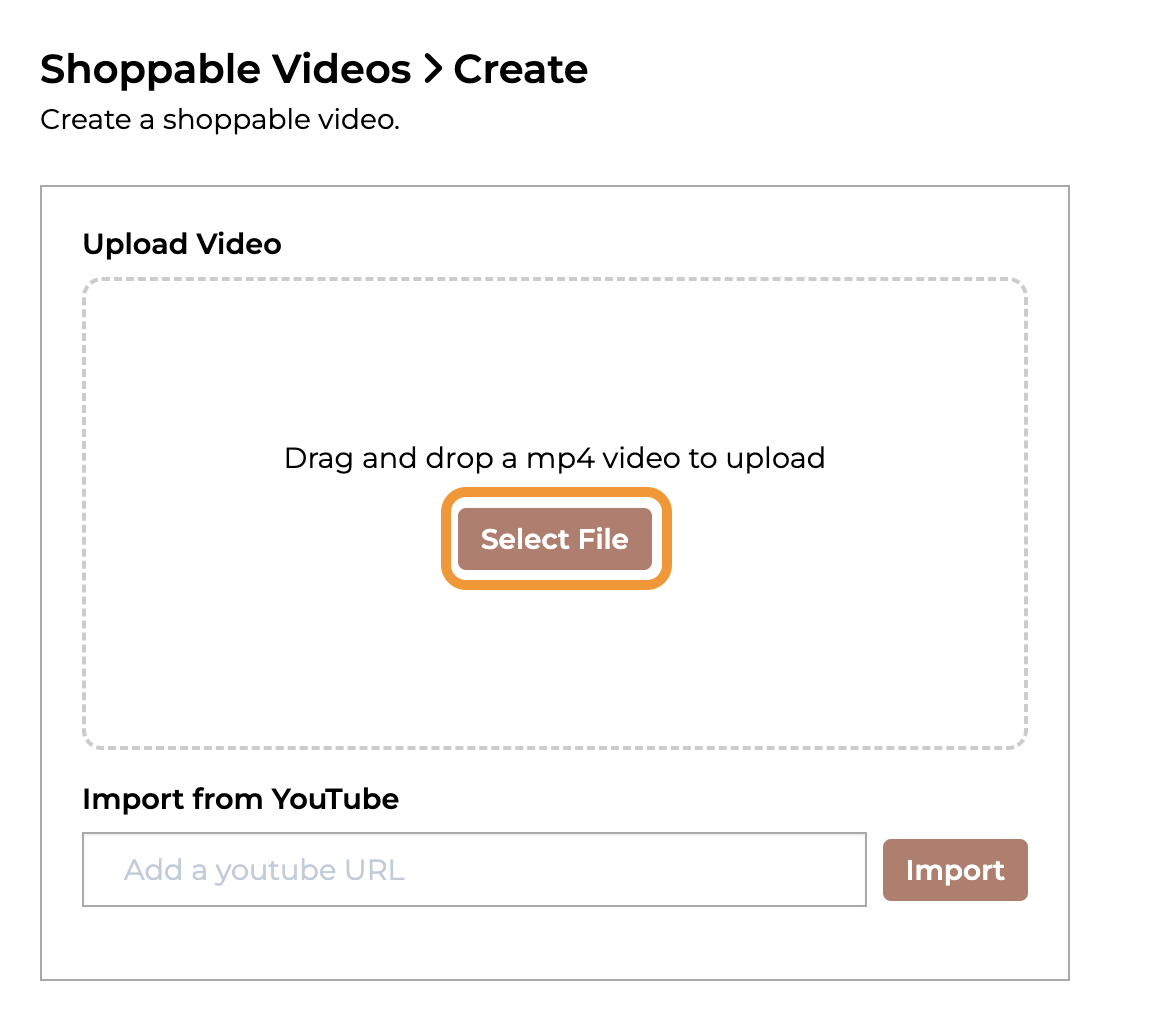
4. Select the video from your computer then click ‘Open’
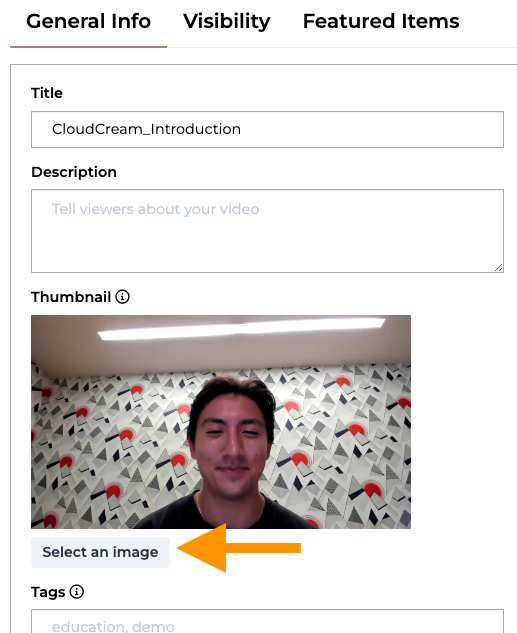
5. While the video is uploading, Update the Title (if needed), Description, Complete any Tags for the video and add a Collection if you would like. Use the (I) for additional information. The Thumbnail will be auto-generated and you can either use it or replace it. 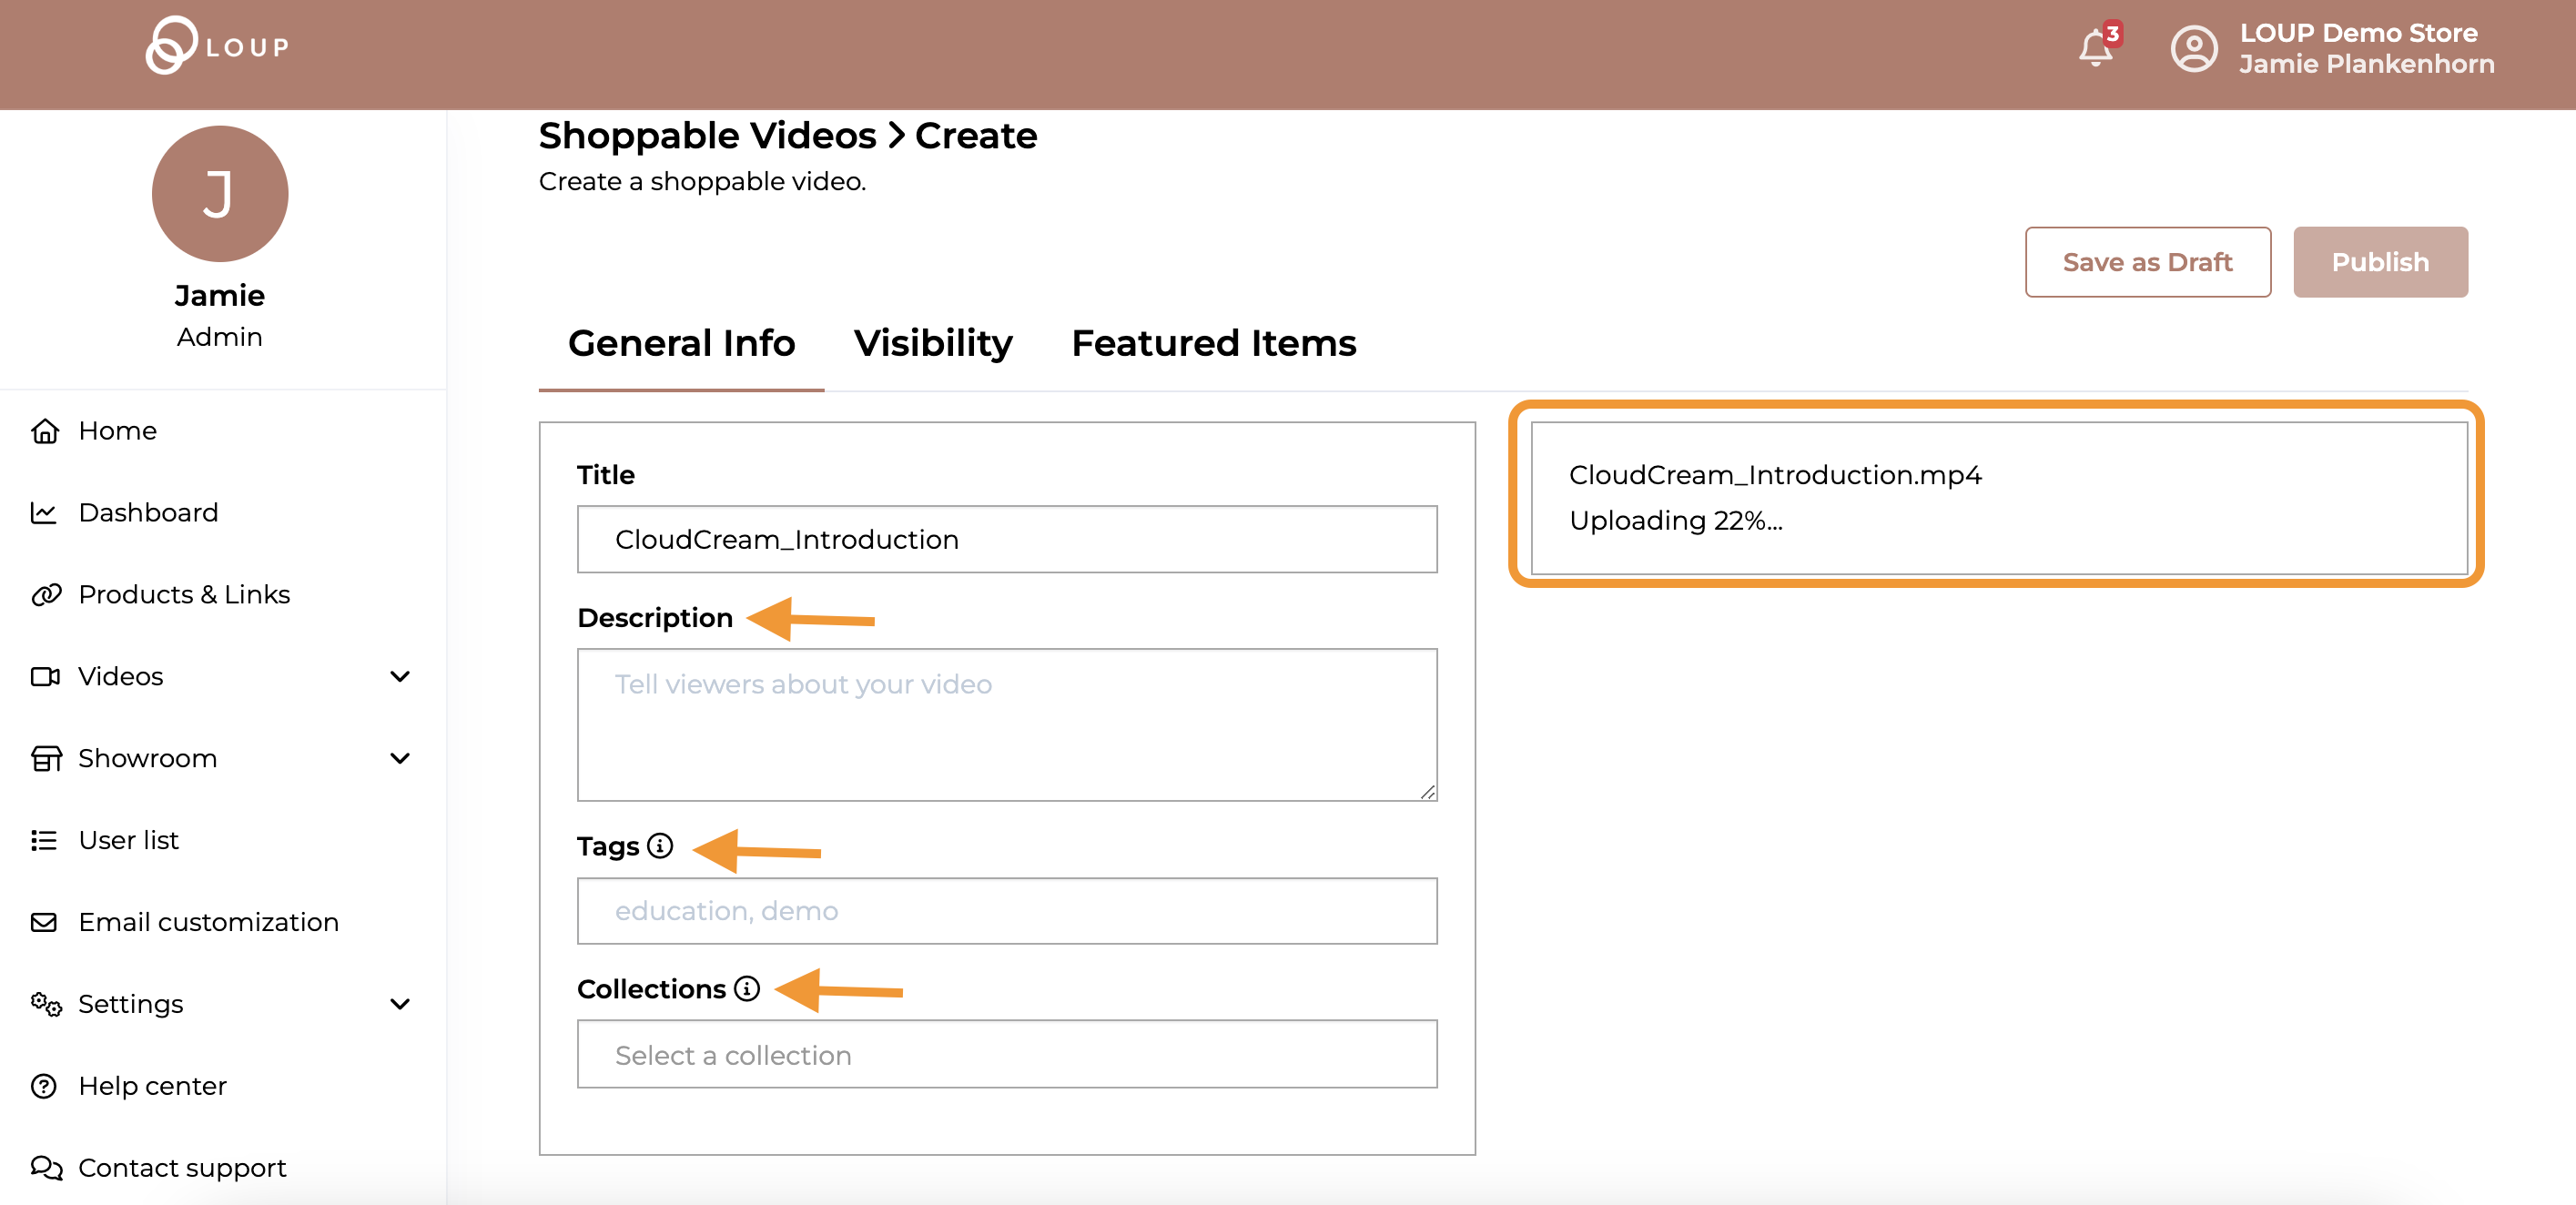
6. Once the video uploads, a thumbnail image will be auto-generated from the first second of the video. You can keep it as-is or update it to whatever you wish. Minimum image size is 800x450 (16:9 ratio).
7. Set the visibility as you would like it to be for your video. By default it will be Public Visibility, All Access.
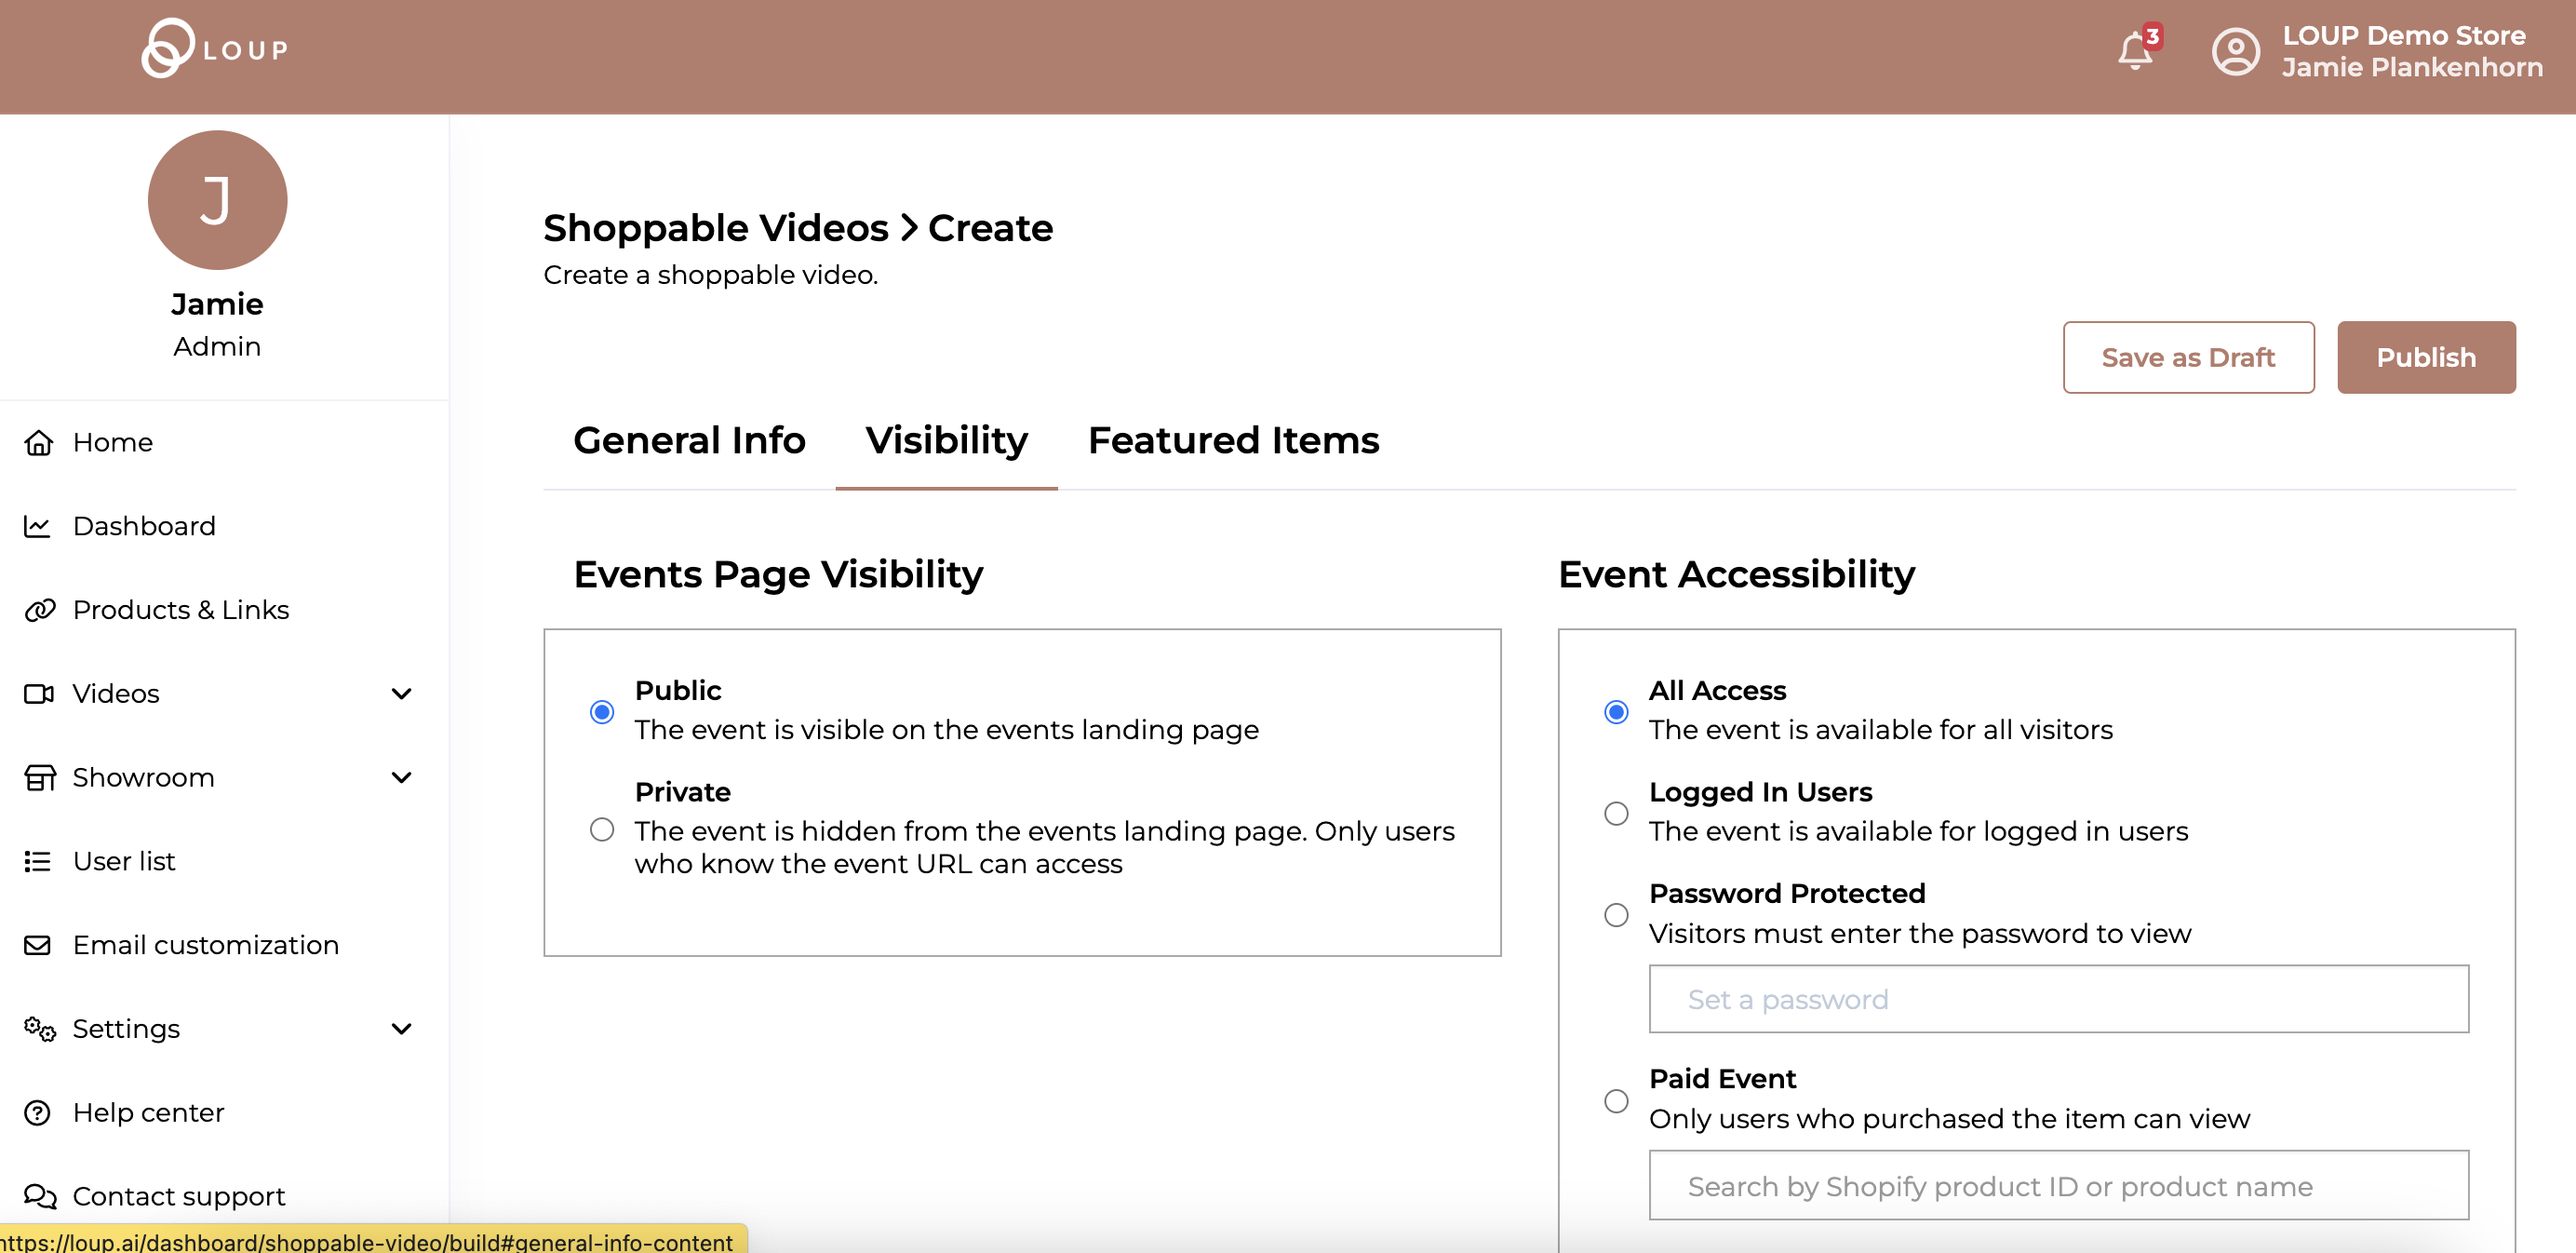
Set as a Private Video
Much like the tool tip explains, a Private event will not appear in your Events page, be promoted as part of the Banner or Pop-Up and is only accessible via the direct link to the event.
Past Events can also be made private which will remove them from the Videos page.
Require users to log in
With the option to require users to log in before they are able to view the video, a pop up will prompt the user to either log in to an existing account or register a new account on your website. This is a great way to capture information and retarget shoppers at a later time.
Adding a Password to a video
Adding a password, will require the password be given before customers are able to view the event page to RSVP or to watch the event - either live or recorded. Once you have added the password to the event, make sure you share it with the people that need it so they can access your content.
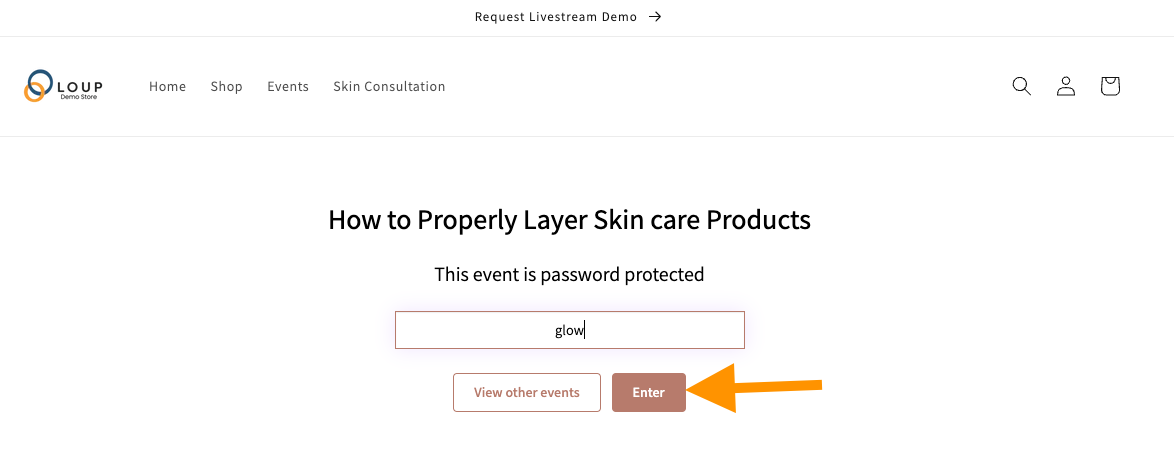
Customers will see a pop-up that will block access to the event RSVP and content until they add the password:
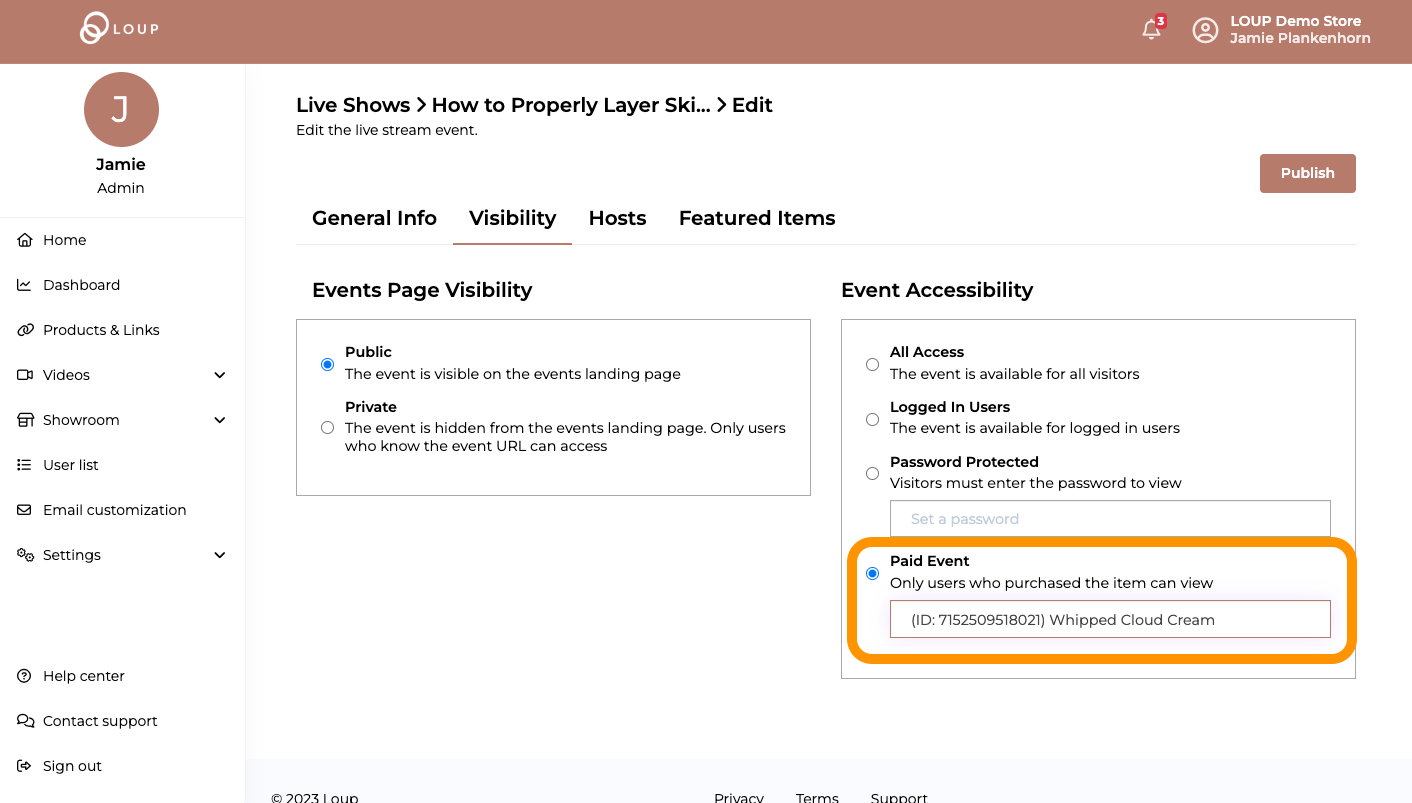
Paid Videos
Paid Videos
Currently paid events are only available to customers with a Shopify integration.
You have the option of tying your event to a product or package that must be purchased before the RSVP will be processed.
To set it up:
Under advanced 'Visibility' tab, select "Paid" from the 'Event Accessibility' box on the right. Then select the product that you would like tied to the event:
Make sure to Publish your changes if it is an existing event. If it is a new event, proceed with your setup.
What a Website Visitor sees with a Paid Event:
When a website visitor clicks on the event tile from your Events page, they will see a pop up that says the product must be purchased. If they have previously made the purchase, they only need to login to verify the purchase. If not, they will be taken to the checkout flow.
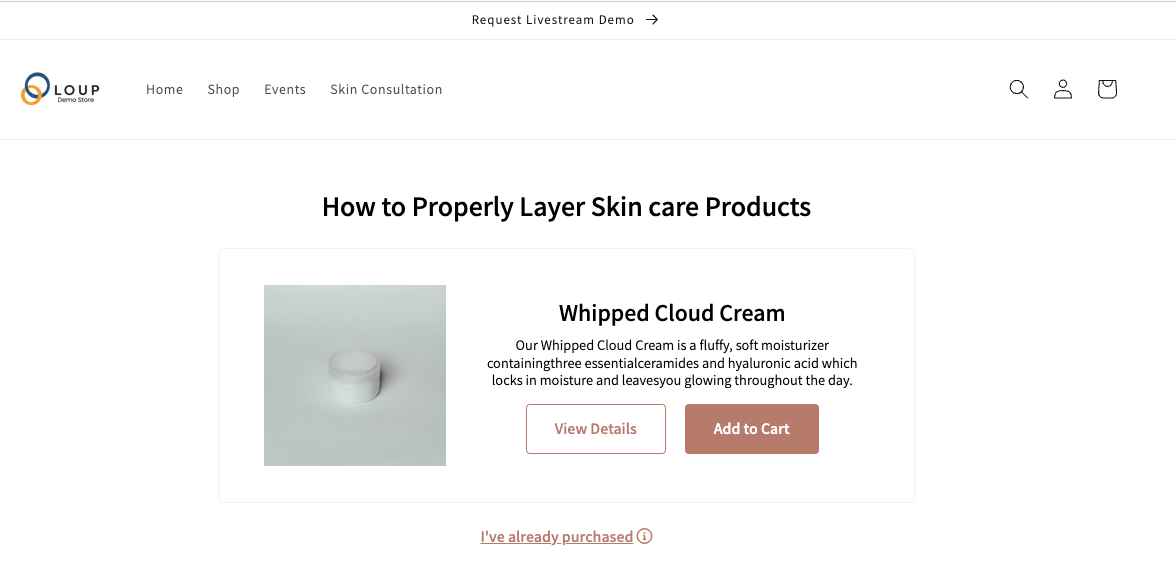
Once the purchased has been verified (either by logging in or by purchasing directly from the pop-up), the website visitor will be RSVP'd for the event.
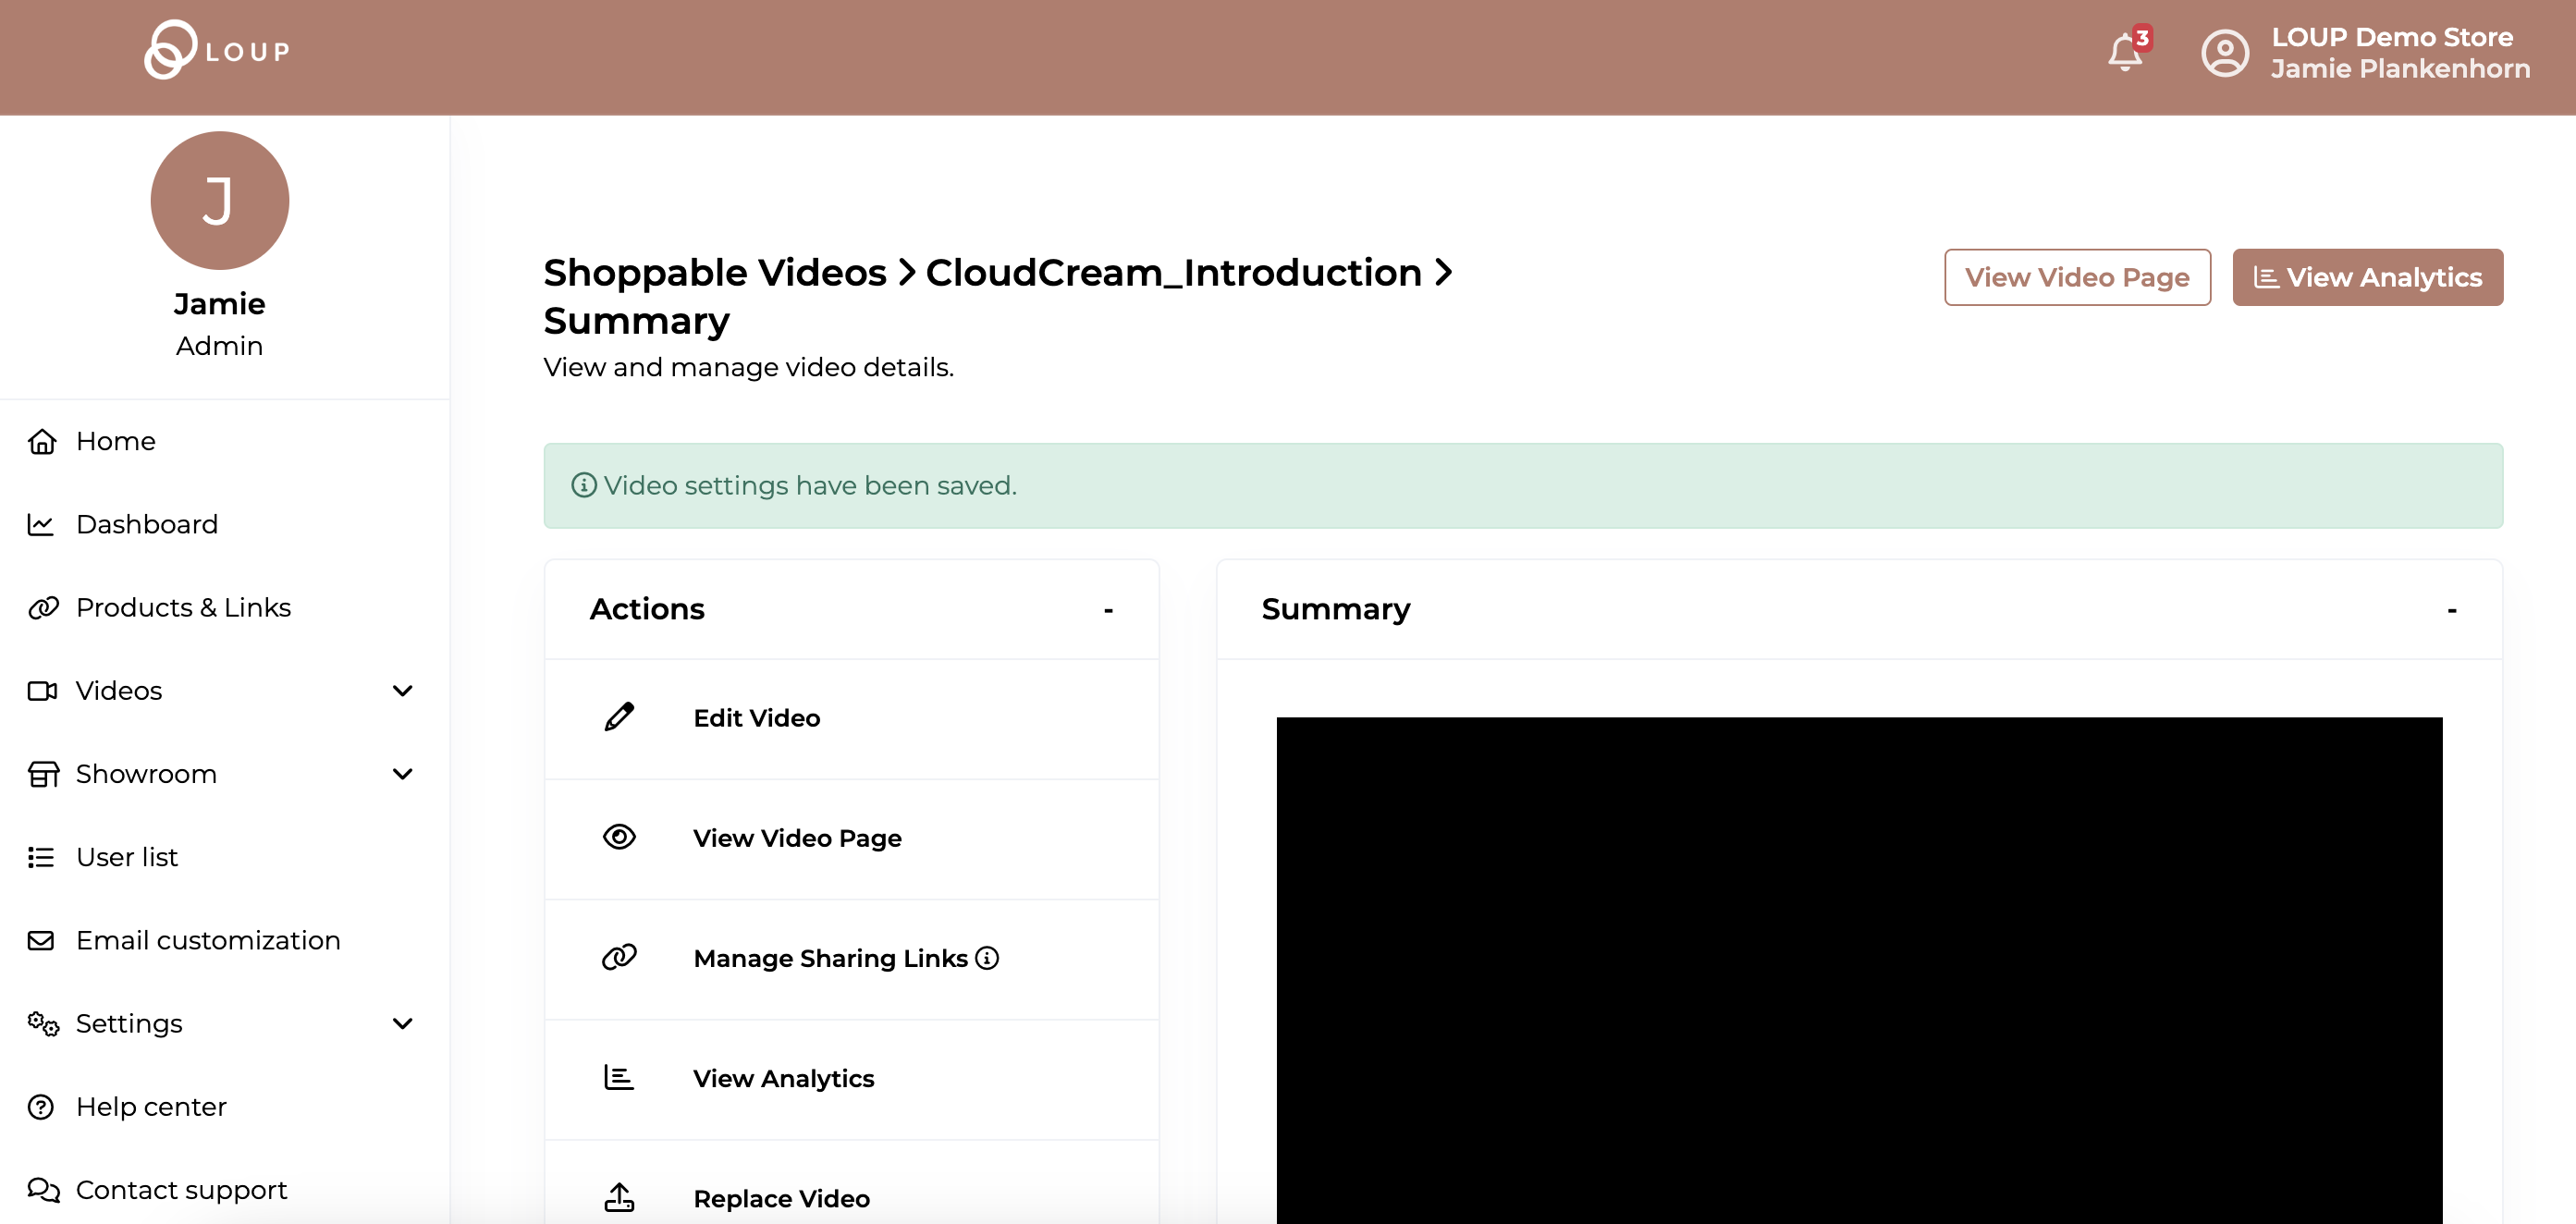
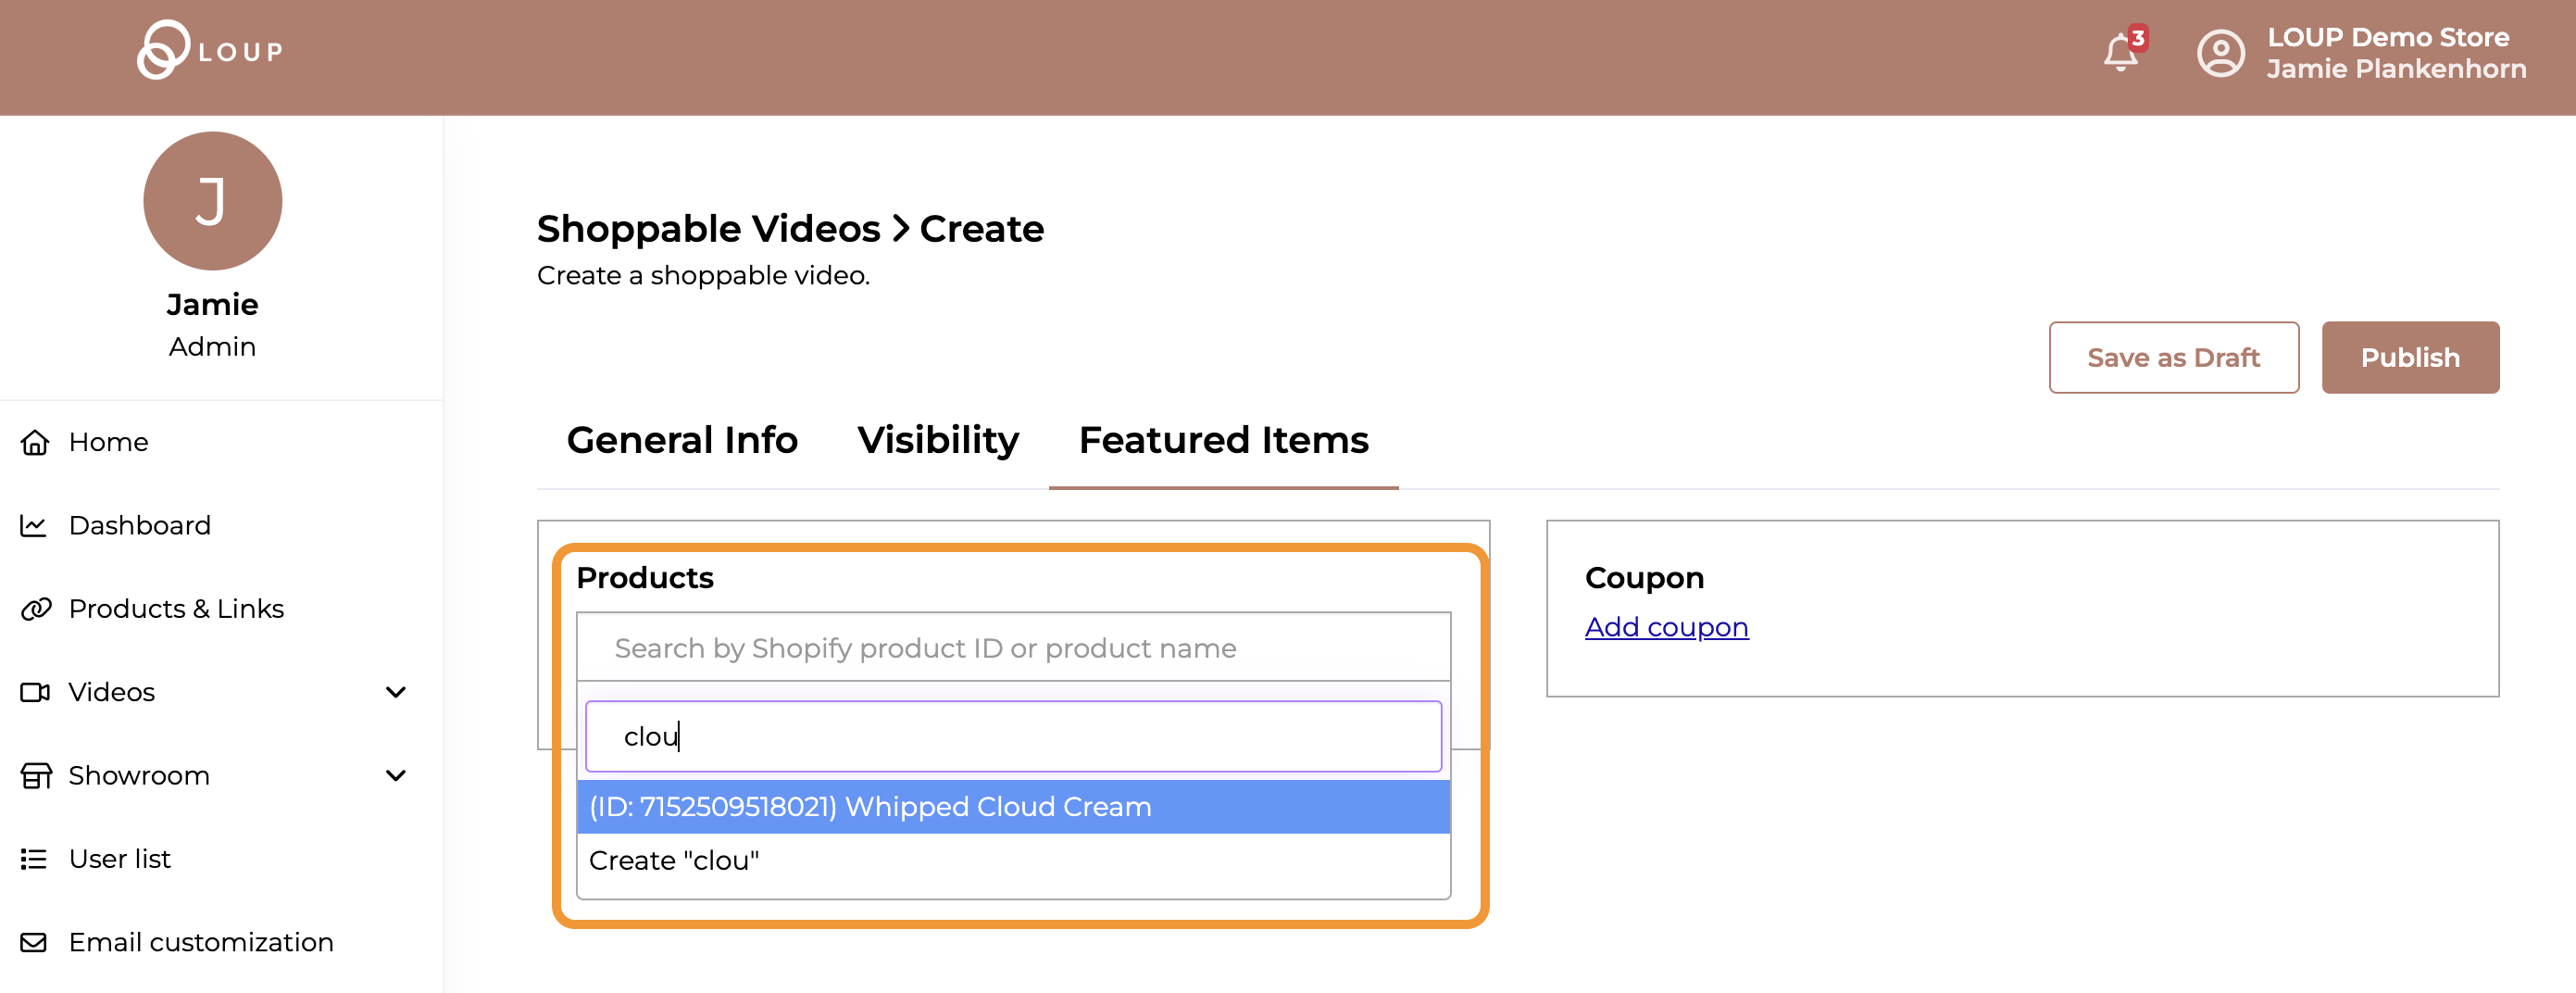
8. Add products to your shoppable video, and if desired a coupon code. Click Publish. You can also save as a draft if you would like - just don't forget to publish your video!
9. Once saved, you will be taken to the Video Summary page. From there you can use the action buttons to go to the live video page on your website or create sharing links