
OBS is a free and open source third-party tool that allows you to add more production to your streaming and video recording. With OBS you can use custom backgrounds, share multiple browser screens at once or custom mix your audio. You can learn more about all the features and functionality of OBS on their website.
- Download OBS from their site
- Use their documentation to get started with their Quickstart Guide
- Make sure to add your audio and video sources and that they are working within OBS before connecting with Loup. This includes Starting your Virtual Camera so that the Camera to OBS connection is established before you connect to Loup.
- From your Loup Pre-Stream broadcast page, select the gear to open the Audio & Video settings dialog box:
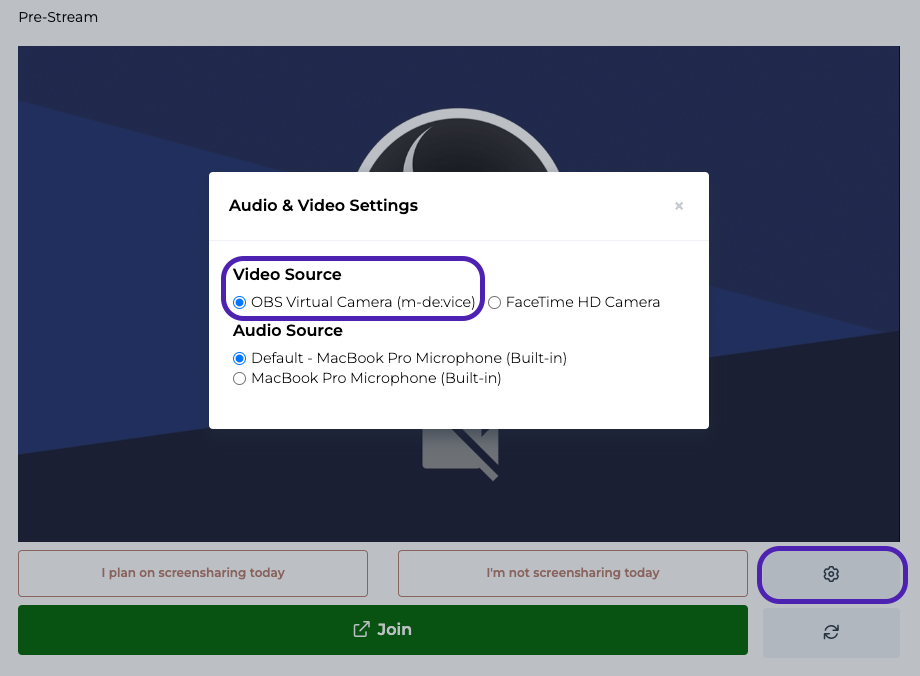
- Select ‘OBS Virtual Camera’ for video and your preferred audio source
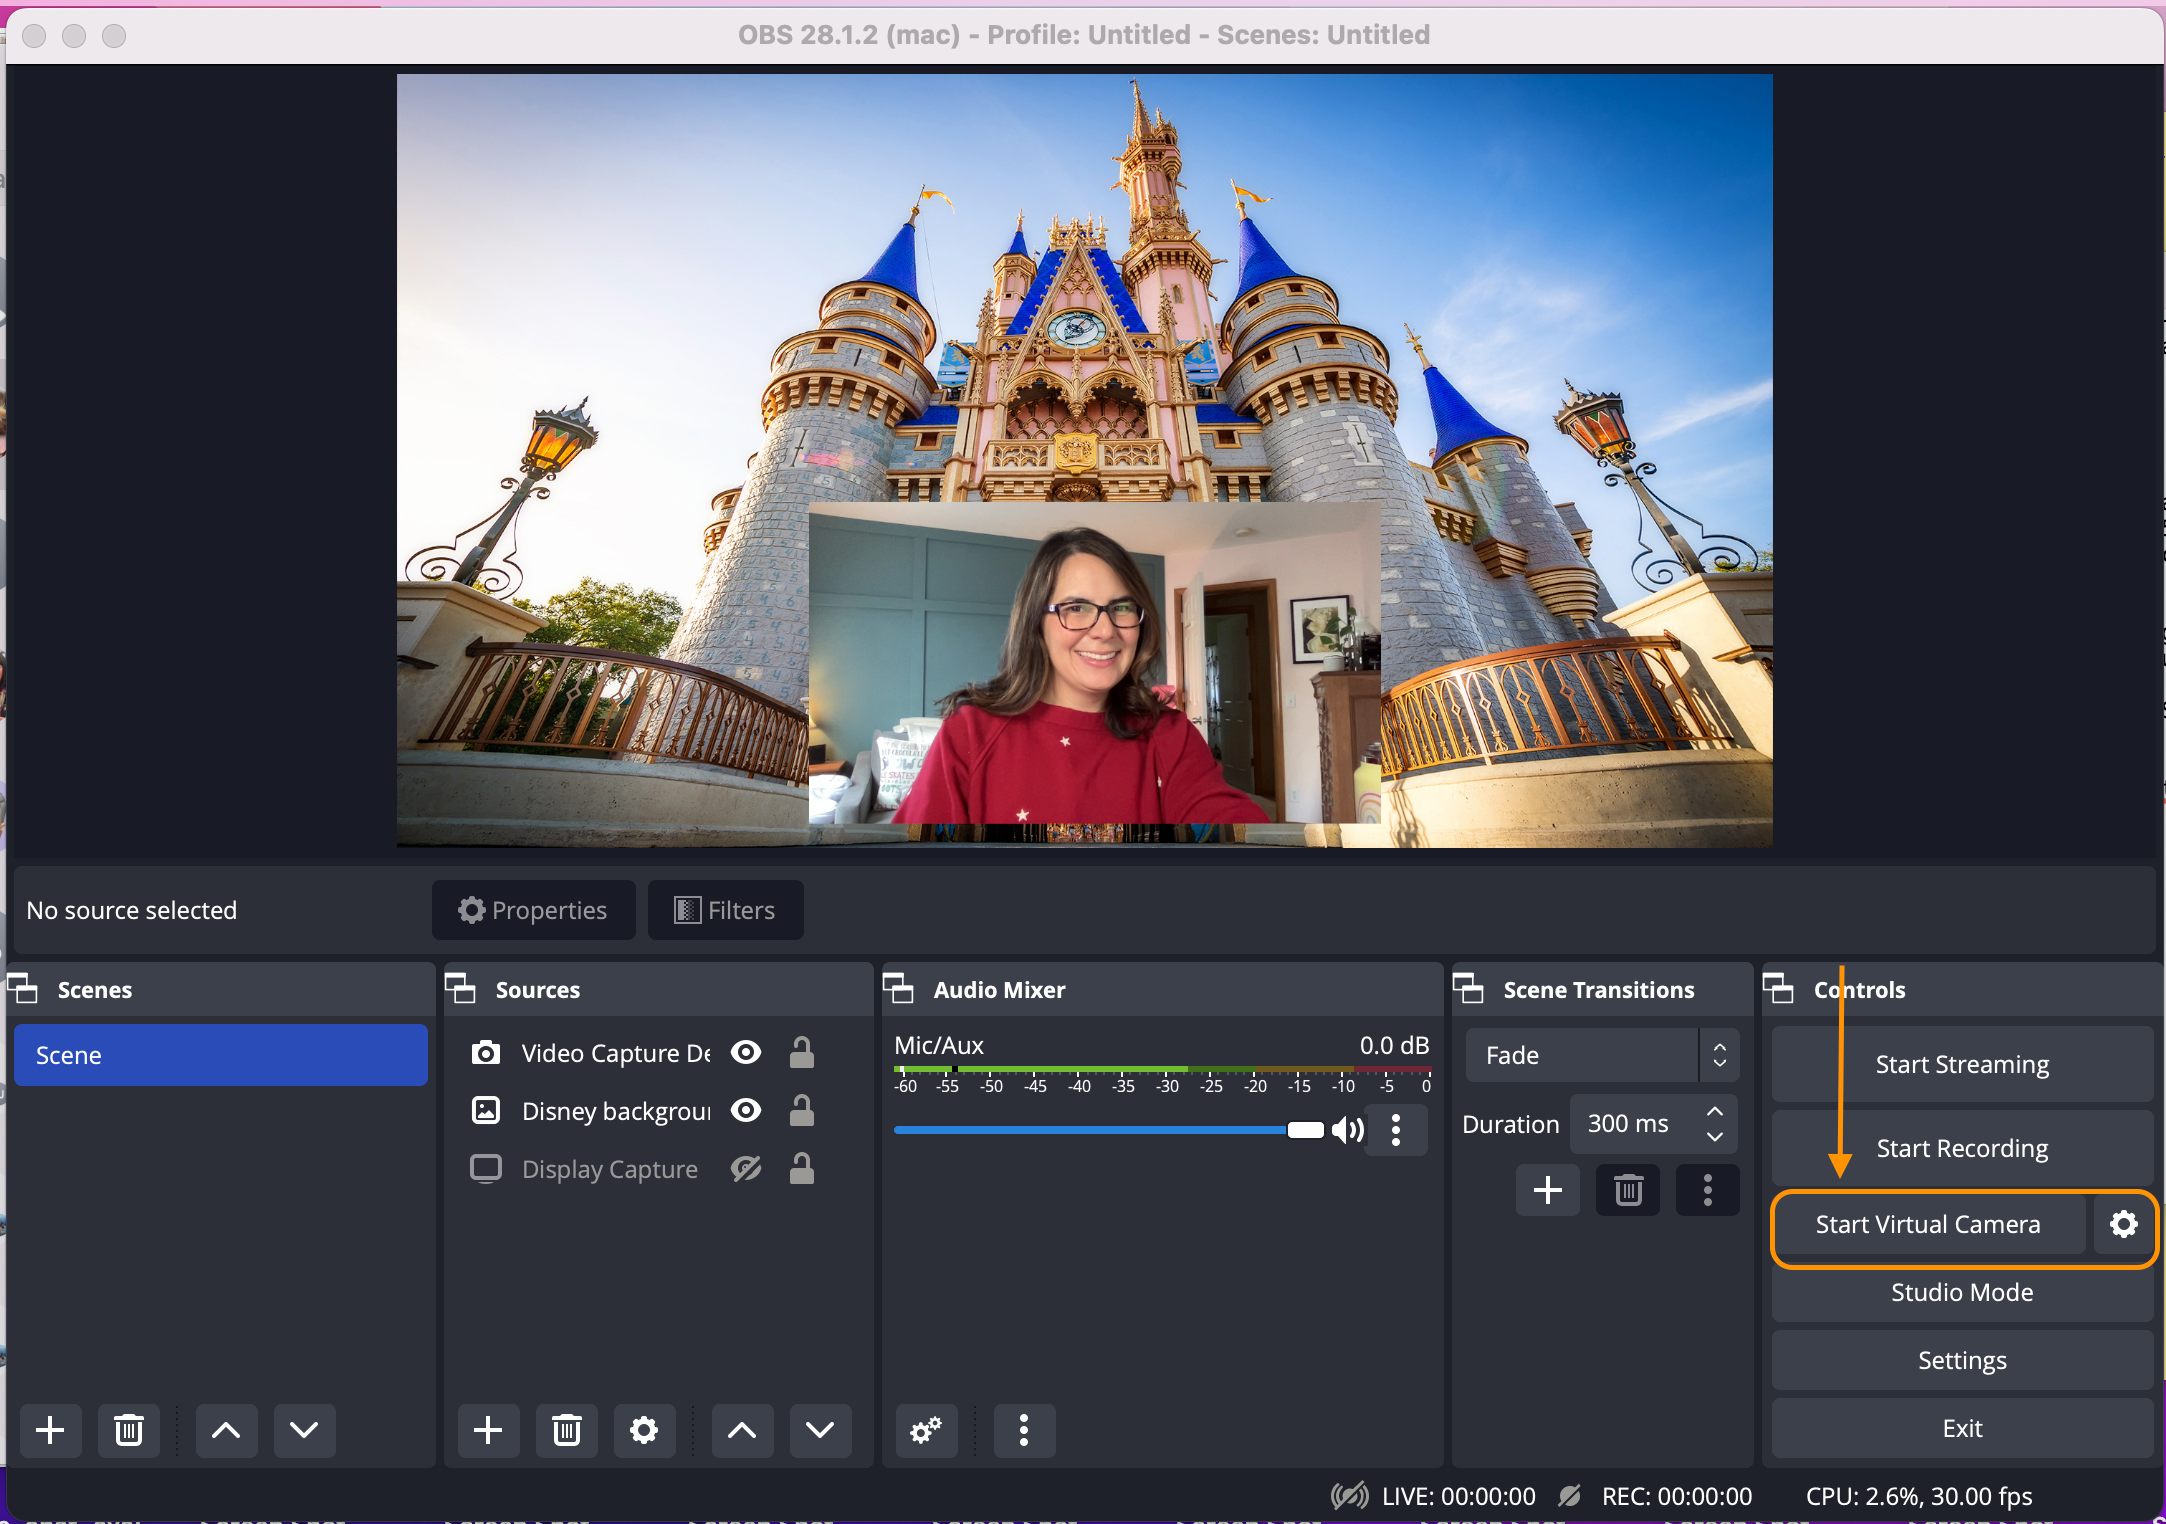
- From your OBS Studio, click ‘Start Virtual Camera’ from the Controls section:
- You will see behind the Audio & Video Settings dialog box, the OBS video is now visible:
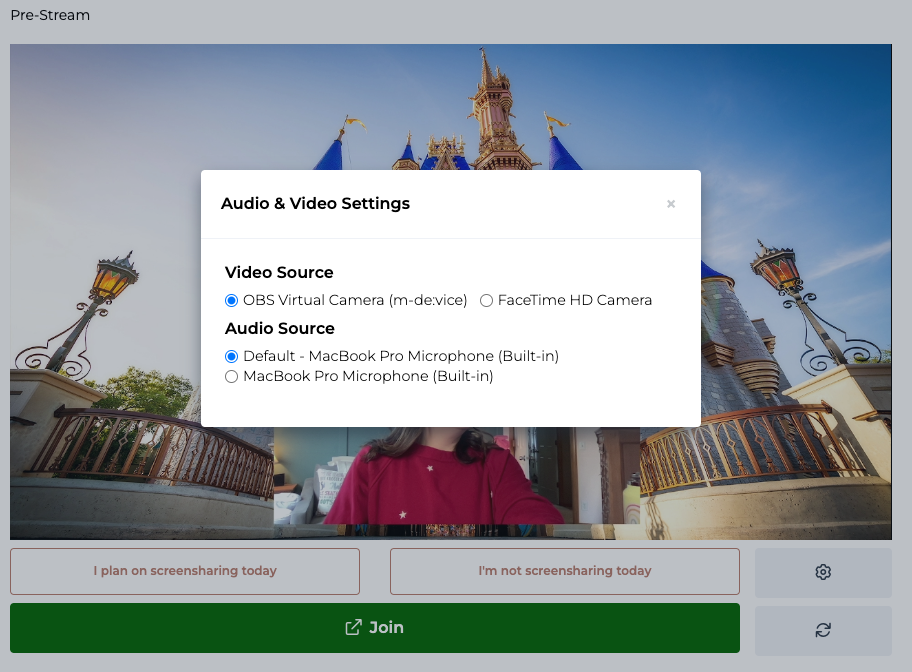
- Close the Audio & Video Settings dialog box by using the ‘x’ in the upper right corner and click ‘Join’
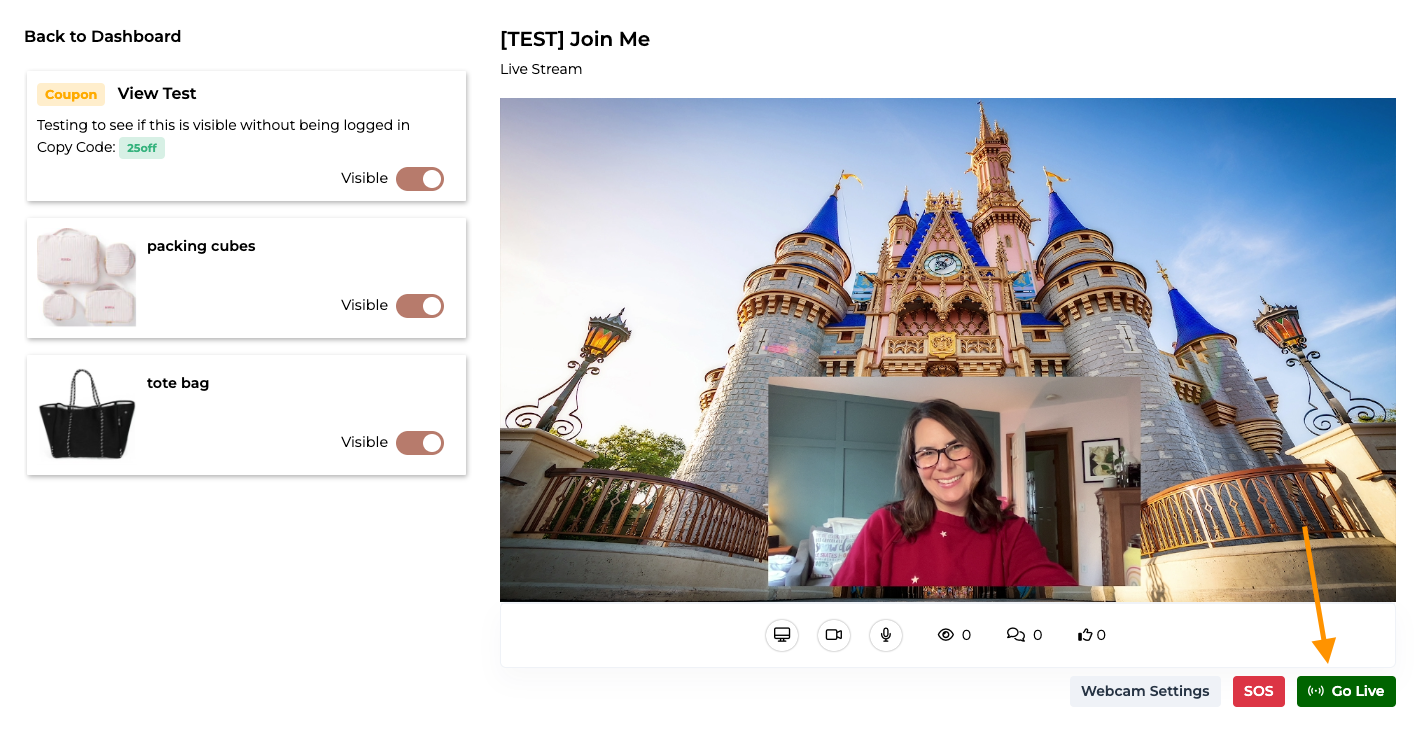
- Use the green ‘Go Live’ button to start your streaming video:
- When you are done with your event, end the stream using the ‘End Stream’ button on your Loup broadcast page
- Stop your virtual camera on the OBS Studio