
Loup currently allows only one audio source per host or cohost screen. If you want to use multiple microphones for the same screen during a live stream, you need to join the two microphones outside of Loup. The solution is different based on if your computer is using iOS or Windows. Please note these instructions are for connecting microphones to laptop or desktop computers and not running multiple microphones through a mobile device for streaming.
For Mac:
You can use a default program called Audio MIDI. This will allow you to join two different microphones into one ‘Aggregate’ Device that Loup can recognize as a single Audio Source.
Can I use two of the same microphone?
Macs will not recognize two versions of the same USB microphone. If you are using Mac, make sure you have two different brands or types of microphones that the computer will recognize as independent devices.
- Follow the instructions for creating an Aggregate device
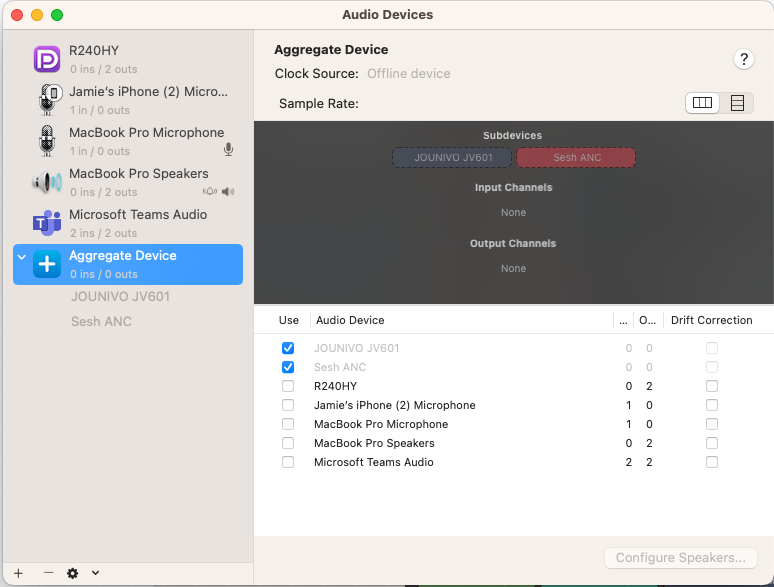
Sample Rate
The Sample Rate does impact if it will work or not. If you do a test and no audio is coming through your Aggregate device, try adjusting the Sample Rate and testing again.
Once your Aggregate Device is created, you are ready to test with a live stream!
Create a Test Event.
Once your test event is created, click the “Go Live” button for the test event. Remember, because this a test event, it will not show up on your events page and no one has been invited to it. 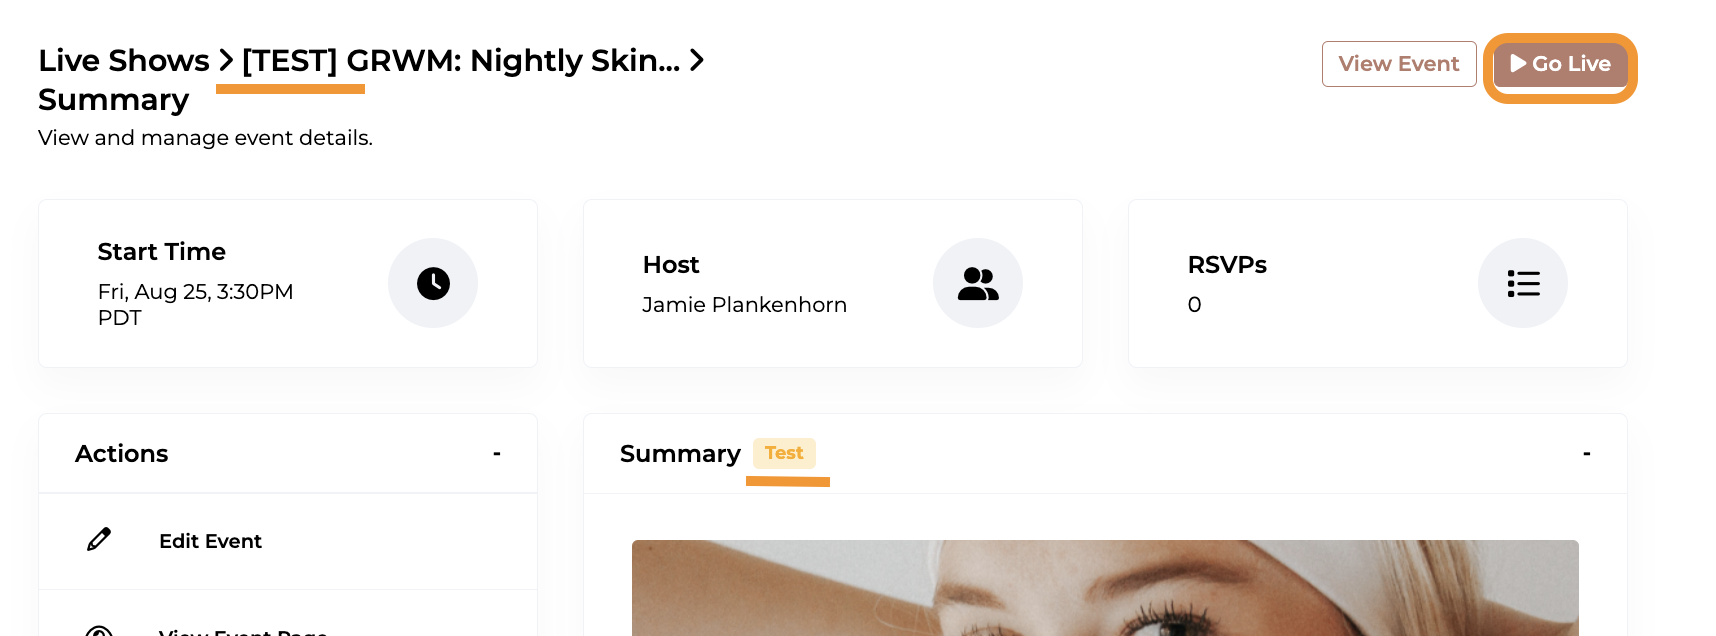
The first screen you come to is the Permission Checks screen. From here, use the settings button to select your audio source. You will see that the Aggregate option has been added to your list of available Audio Sources. Please select it:
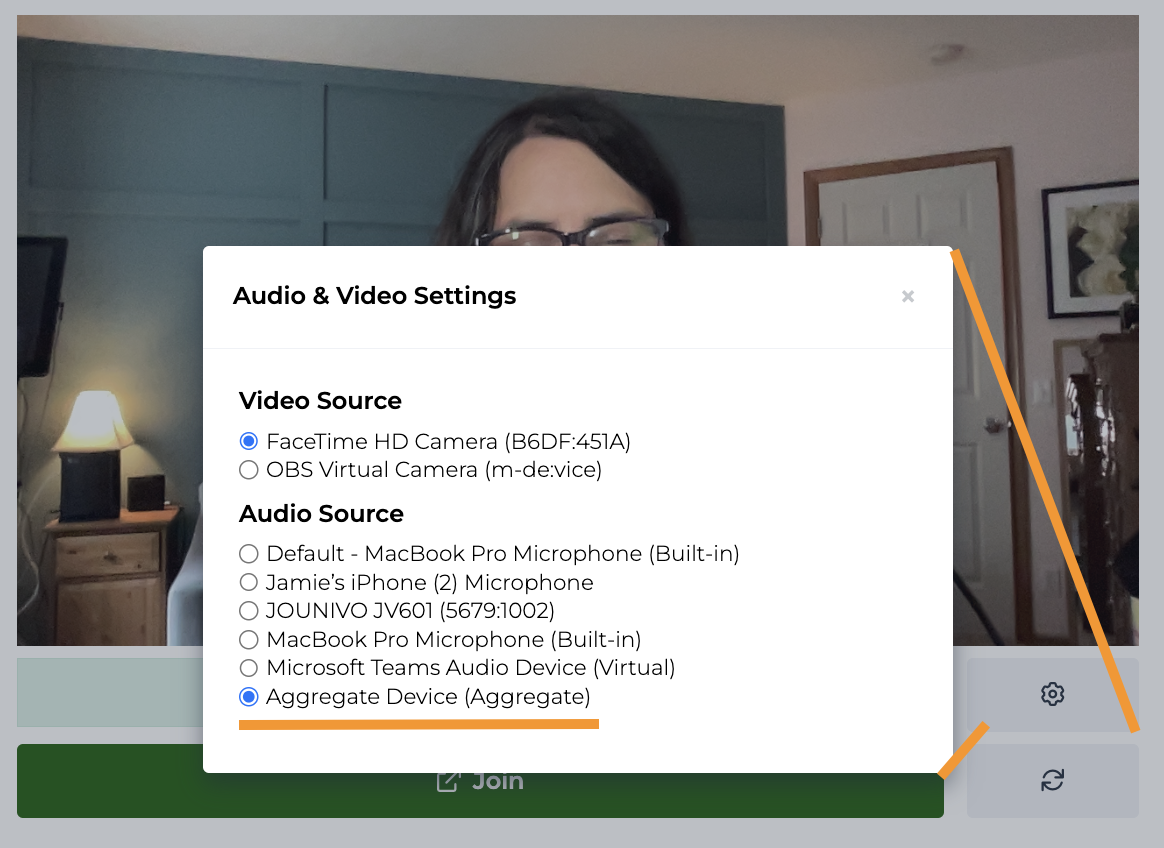
Click ‘Join’ to be taken to the next screen
Click 'Go Live' to start your stream
Run a quick live Event where you can test speaking into each microphone. For example, put one microphone on the right side of your computer and one on the left. Speak back and forth into each of them to make sure they are both picking up your voice. Or if you have two people, each person gets a microphone to test. Have a quick conversation where each of you speak into the microphone like it is a real live event.
End your stream by clicking the ‘End stream' button.
From the Event Summary page, you can access the video you created to see if the microphones are working as you expect them to.
Ensure your live event recording picked up both microphones and you are all set for your next Live Event with customers!
For PC:
PCs do not have a mixer by default, so you have to download a third party software. Voicemeeter is an industry standard and operates on a donation basis.
- Install the Voicemeeter system you would like to use, based on how many microphones you would like to join. For testing purposes, we downloaded the standard version.
- Plug in your microphones - depending on if this is the first time you have plugged in your microphones, you might have to set them up first
Now that your microphones are plugged in and your Voicemeeter is installed, please use their setup documentation and/or videos to get your microphones selected as inputs and your speakers set as outputs for the version that works best for you. You should be able to see the audio output is registering both microphones before you move on to testing with Loup.
Once your microphones and speakers are successfully connected to Voicemeeter, it is time test with Loup!
Create a Test Event.
Once your test event is created, click the “Go Live” button for the test event. Remember, because this a test event, it will not show up on your events page and no one has been invited to it.
The first screen you come to is the Permission Checks screen. From here, use the settings button to select your audio source. You will see that the Voicemeeter option has been added to your list of available Audio Sources. Please select it.
Click ‘Join’ to be taken to the next screen
Click “Go Live” to start your stream
Run a quick live Event where you can test speaking into each microphone. For example, put one microphone on the right side of your computer and one on the left. Speak back and forth into each of them to make sure they are both picking up your voice. Or if you have two people, each person gets a microphone to test. Have a quick conversation where each of you speak into the microphone like it is a real live event.
End your stream by clicking the ‘End stream' button.
From the Event Summary page, you can access the video you created to see if the microphones are working as you expect them to.
Ensure your live event recording picked up both microphones and you are all set for your next Live Event with customers!